Not sure why, but once again we are looking for a house to buy and renovate, this time in Europe, Italy or Croatia. Inspired by Frances Mays and her passion for travel, art and crumbling estates, we are also looking for a place to settle in during the summers and autumns, always on the hunt, even with troubles at home upstate New York, mostly an aging couple of parents with huge health issues as well as two brothers going through health nightmares, we nevertheless keep moving in the direction of that house under the Sun! Here is a link to one I found today:
Archive for the ‘Uncategorized’ Category
Is this a house we could buy and live in?
Posted in Uncategorized on September 8, 2026| Leave a Comment »
Madrid, reconsidered
Posted in Uncategorized on July 28, 2026| Leave a Comment »
Attachment available until Aug 27, 2026
Click to DownloadMadrid_Reconsidered.docx
84.2 MB
old kitchen
Posted in Uncategorized on January 23, 2024| Leave a Comment »
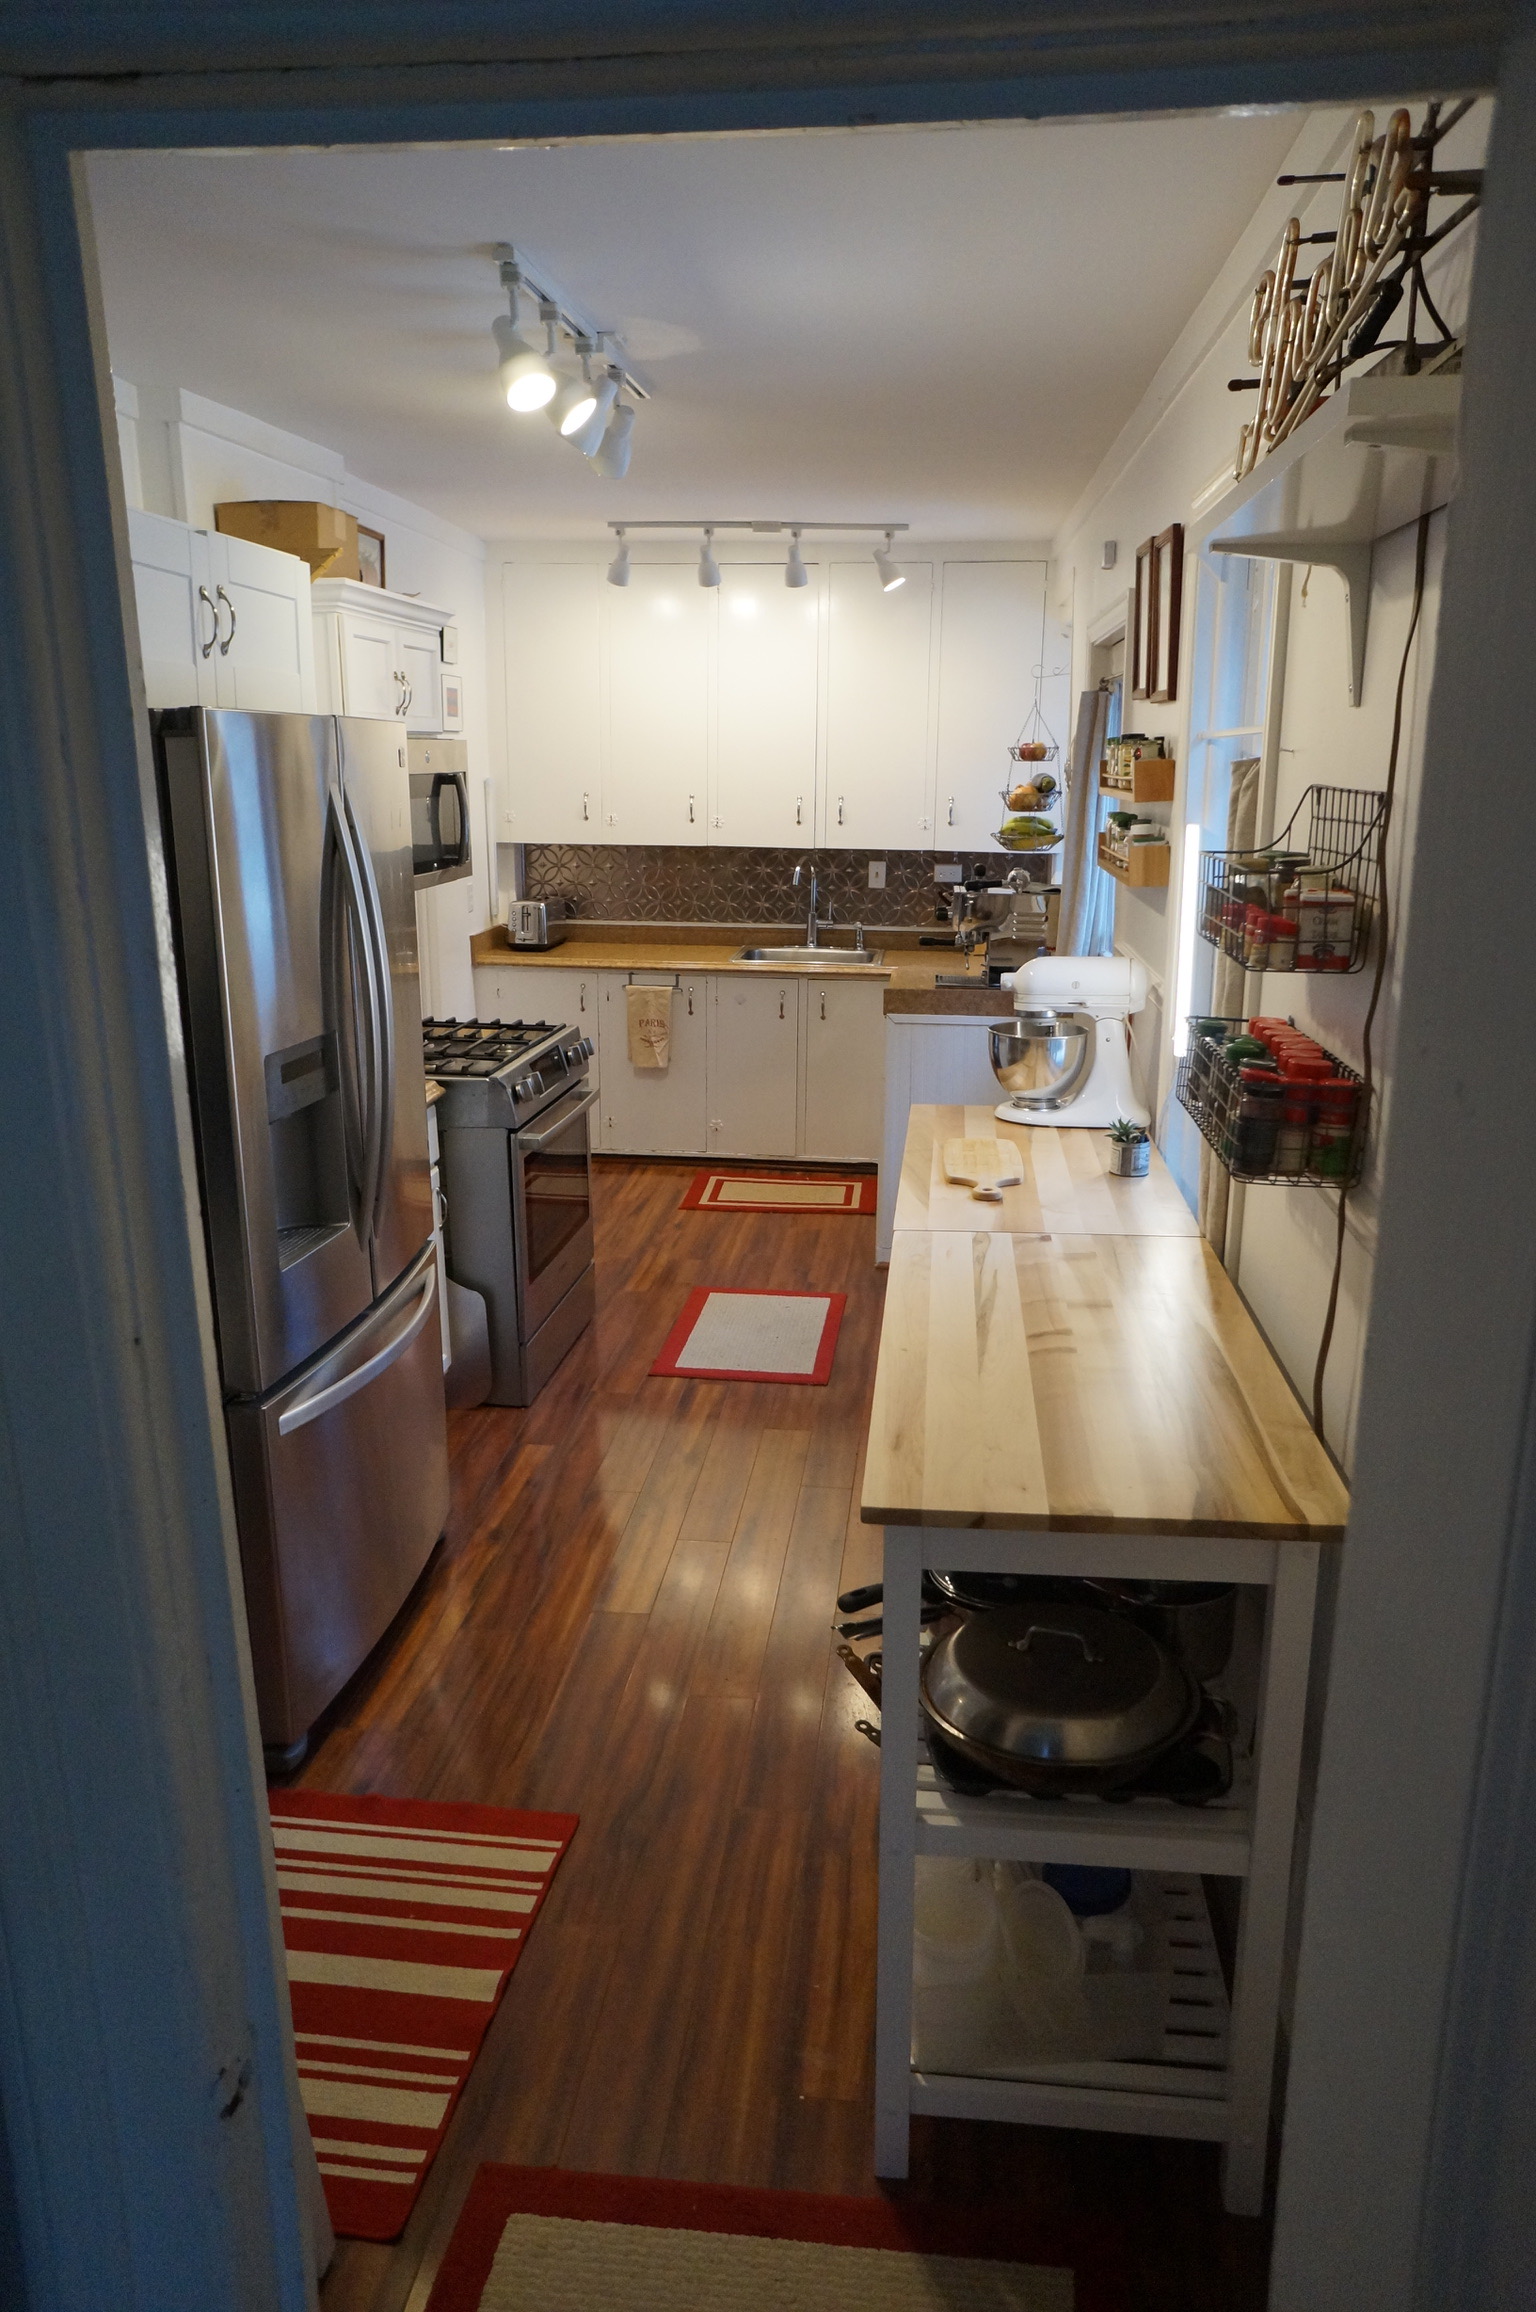
old farmhouse kitchen renovation
Posted in Uncategorized on August 25, 2022| Leave a Comment »
Yes it is now 2.5 months and the kitchen is still not finished, the contractor has left, and we are piecing together the rest of the story….how to get it all done, it is OVERWHELMING! The one nice thing is the old posts we uncovered during gutting, we will keep them exposed, a bit of history in this old 1885 farmhouse!
-

- img 2824
-

- img 2825
-

- img 2827
-

- img 2843
amazing flowers at the mall!
Posted in Uncategorized on July 21, 2022| Leave a Comment »
these guys do a great job at the mall! form a few little flowers grew this beautiful garden bed!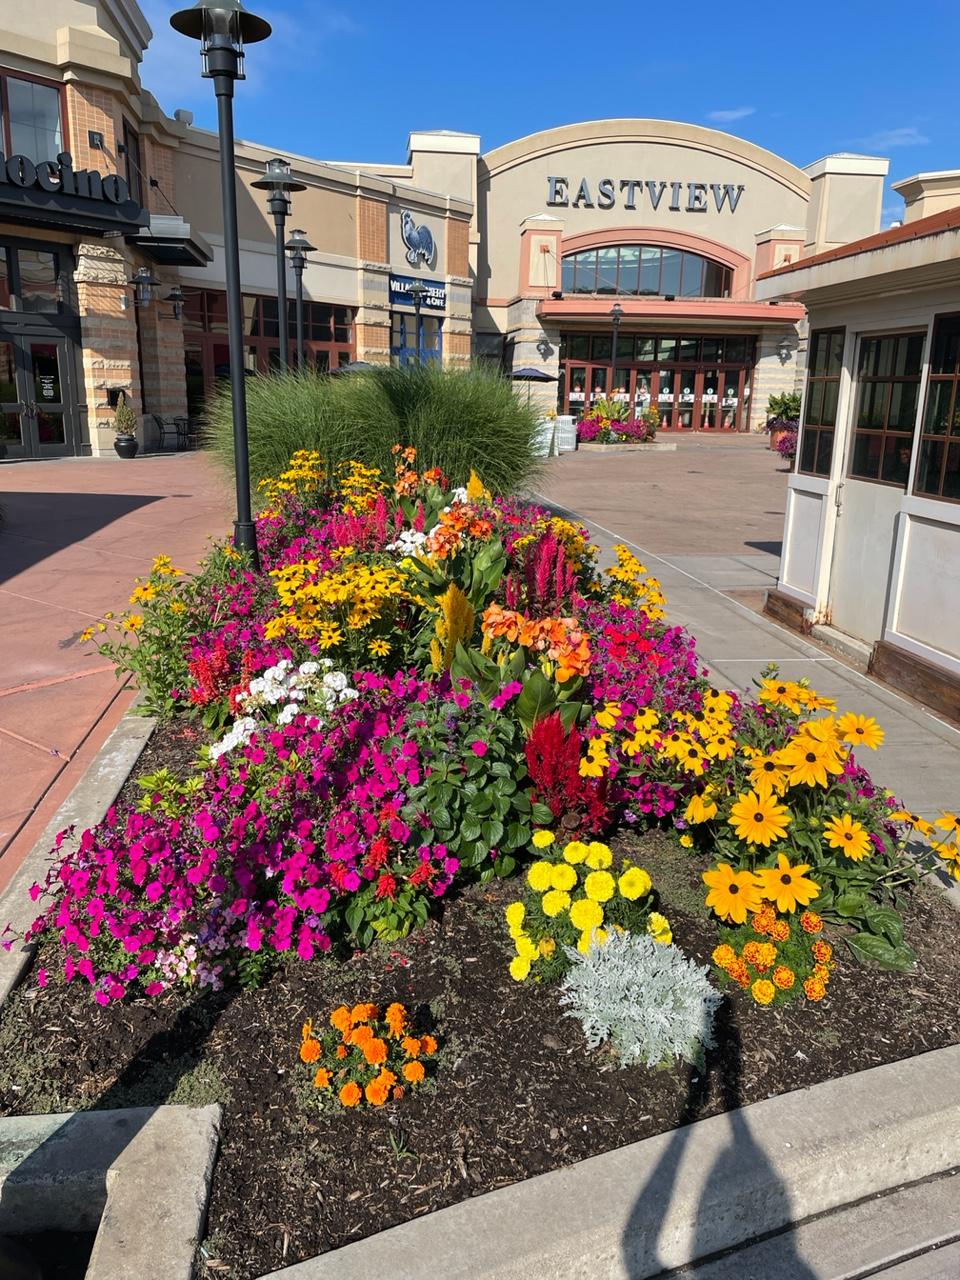
easy summer strawberry pie
Posted in Uncategorized on July 18, 2022| Leave a Comment »
The quickest pie or tart I ever made!
1 Marie Calender pie crust
a pint of sliced strawberries
5 cups of prepared vanilla pudding from the store
Bake the crust for thirty minutes at 350, cool, pour in the vanilla pudding, add sliced strawberries on top! Refrigerate and serve with whipped cream!
The windows go in to the old wall!
Posted in Uncategorized on July 12, 2022| Leave a Comment »

Farm house kitchen gut and renovate! AGAIN!!!!!
Posted in Uncategorized, tagged kitchen, renovation, tiny house on June 23, 2022| Leave a Comment »

The photo above is how it looked before the demo. Not sure why but we are doing it again, for the second time, with out third house! It’s not fun in the least but we needed to feel comfortable and happy and not always bumping into each other as we are both in the kitchen a lot. The gut started 5 days ago and it is still being gutted. Her are the photos of this kitchen as we go through the gut, very dusty and only one guy doing the whole job but we waited 4 years to find someone that wasn’t exorbitantly expensive and non stop complaining about their timeline.
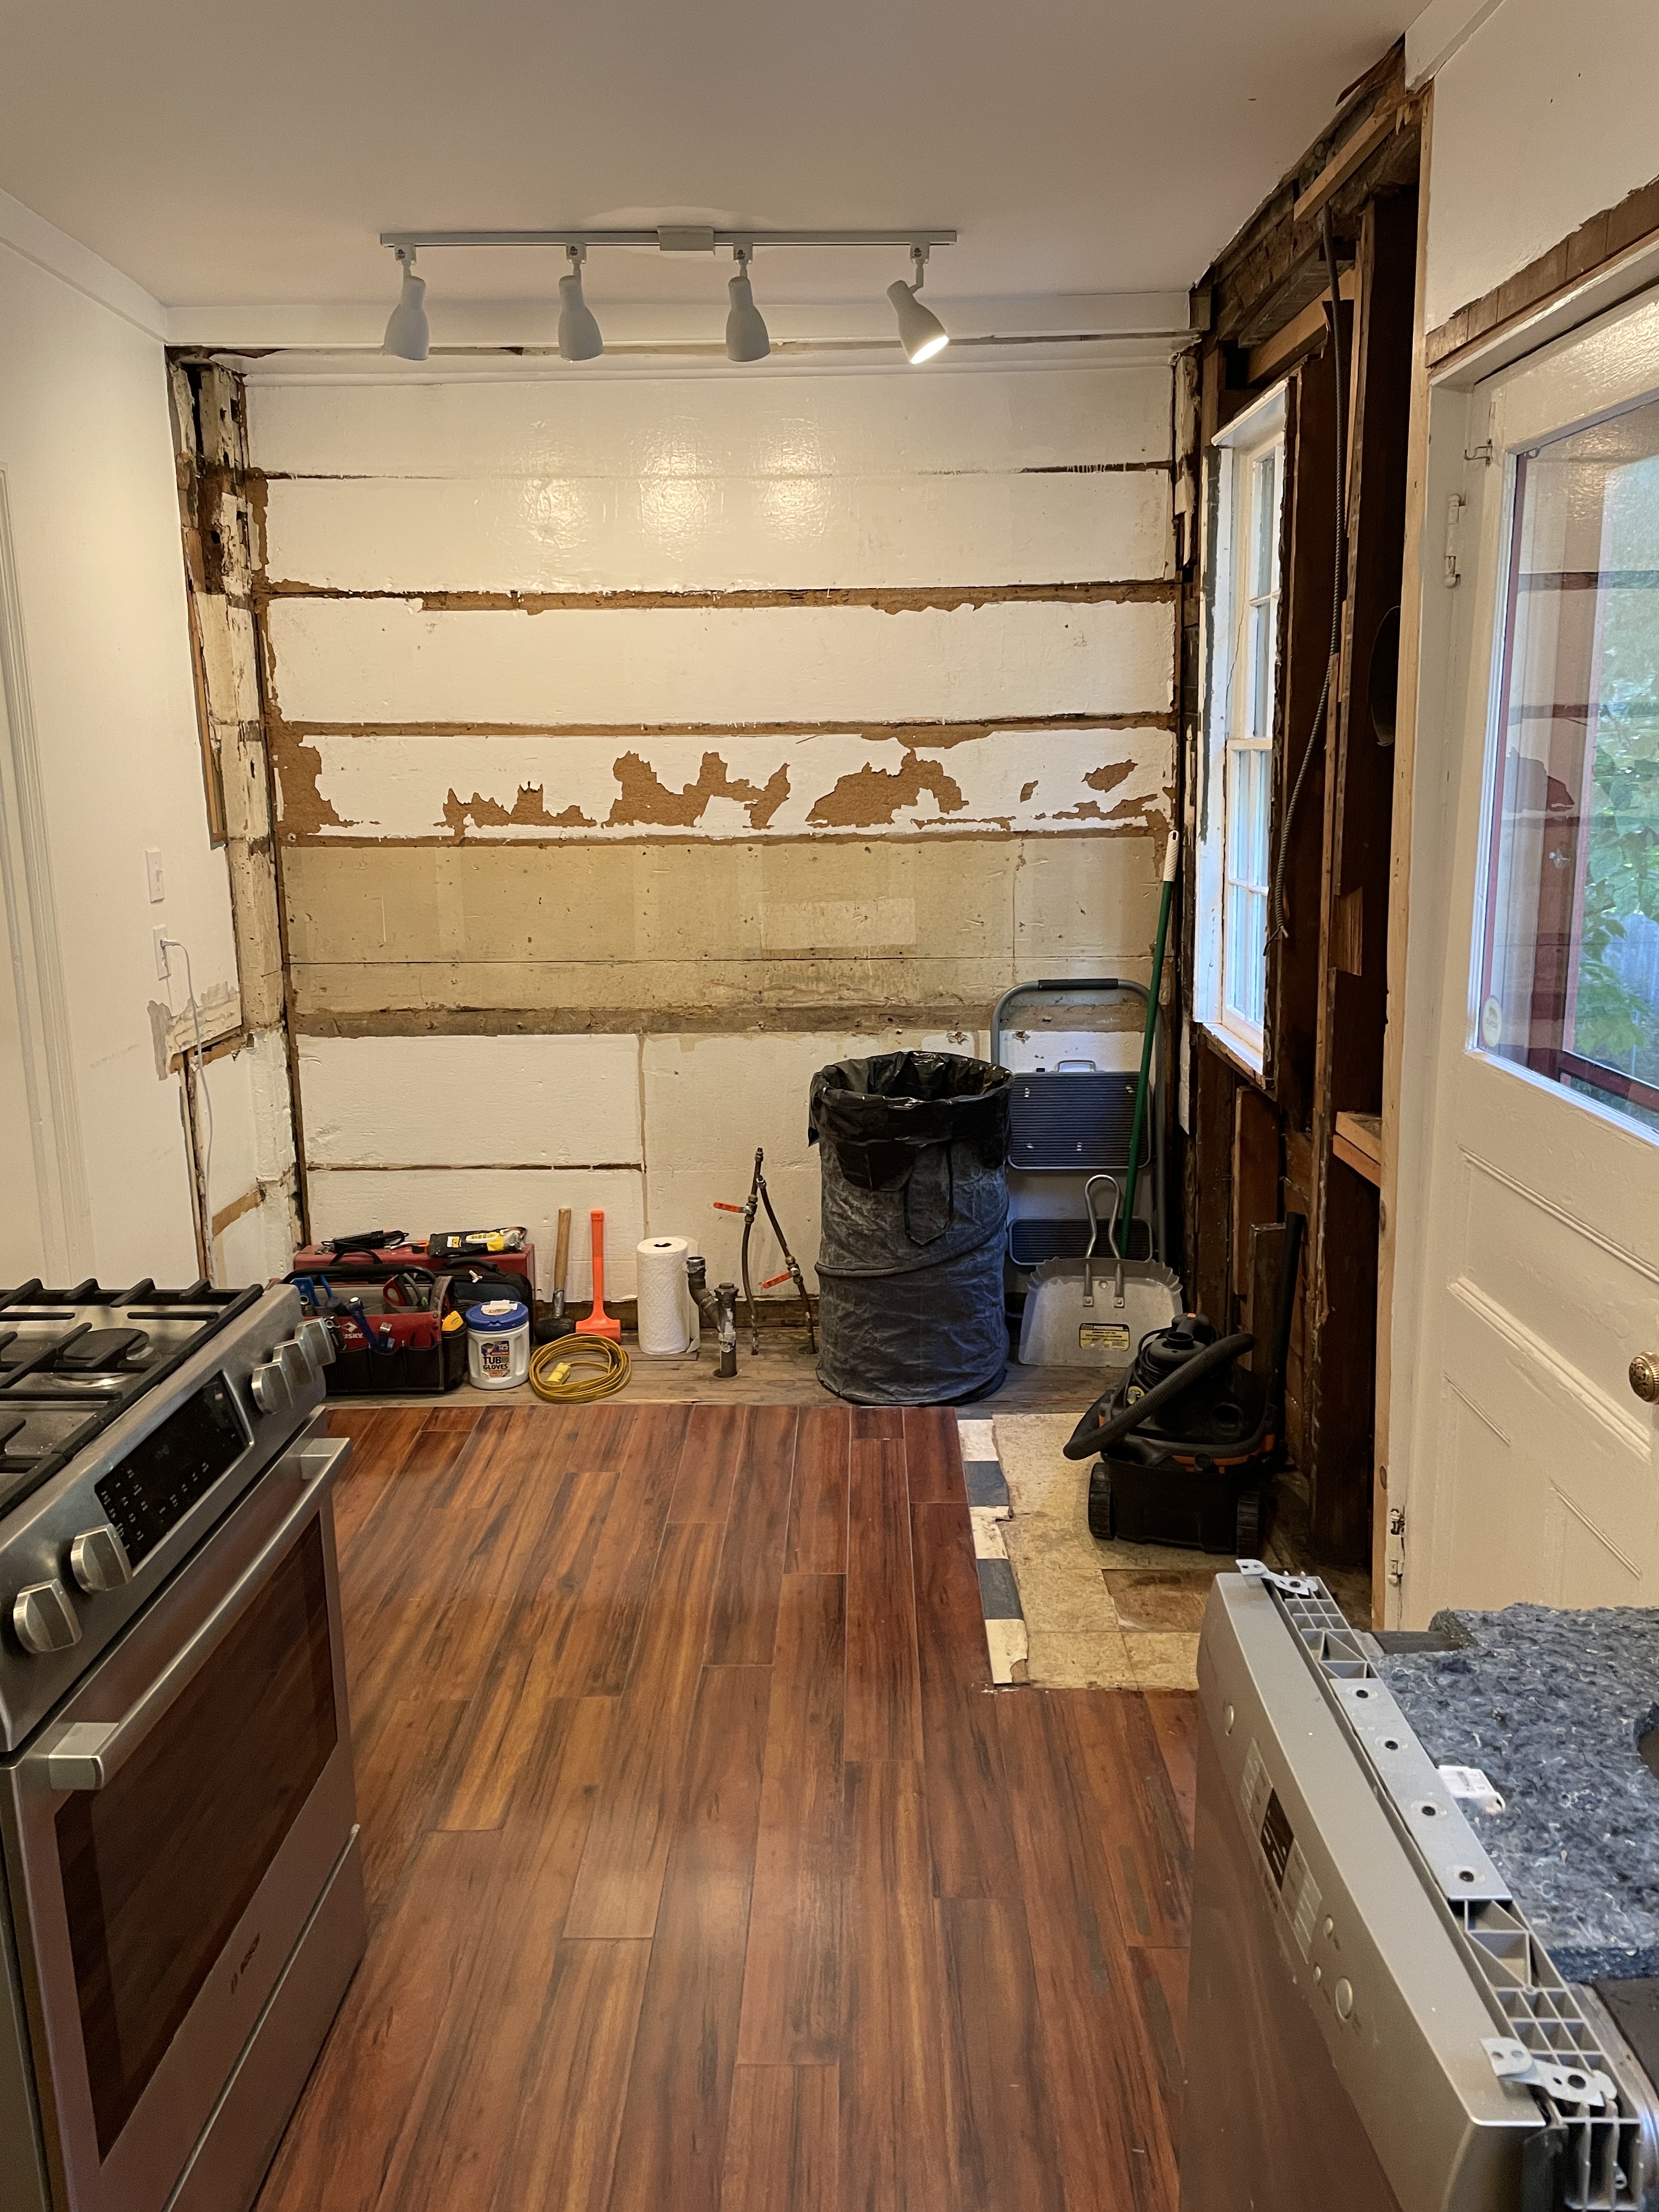

Next up more demo photos!
apple galette!
Posted in Uncategorized on October 1, 2021| Leave a Comment »
try this at home!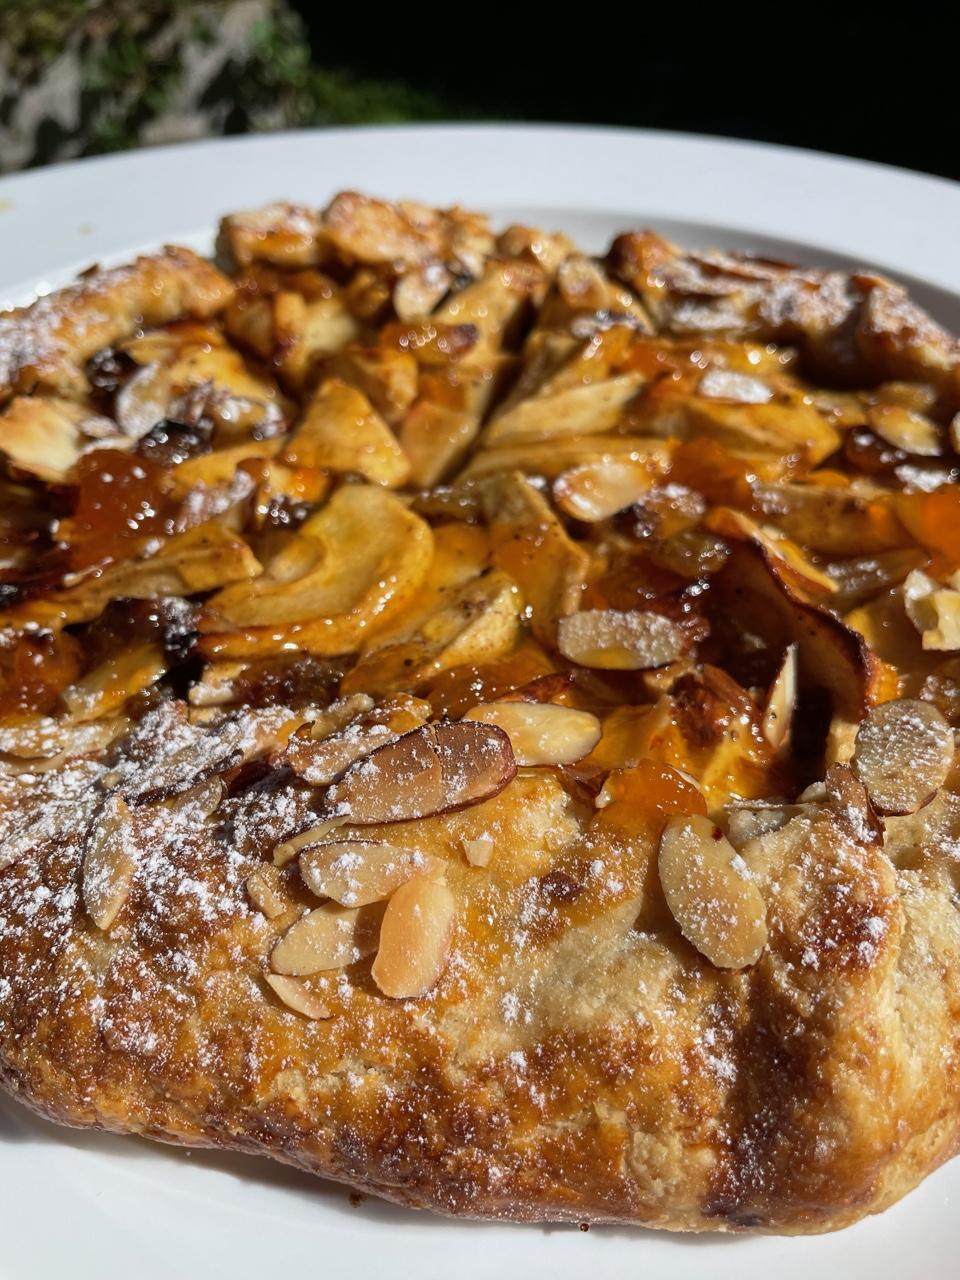
pizza with garlic scape pesto, potatoes and sliced speck
Posted in Uncategorized on August 2, 2021| 1 Comment »
I used ready made raw pizza dough, just half the big ball, rolled it out and layered it with garlic scape pesto that I made with basil and feta, then layered it with thinly sliced potatoes, shredded speck, olive oil and pepper and salt, bake it for 15 minutes at 450!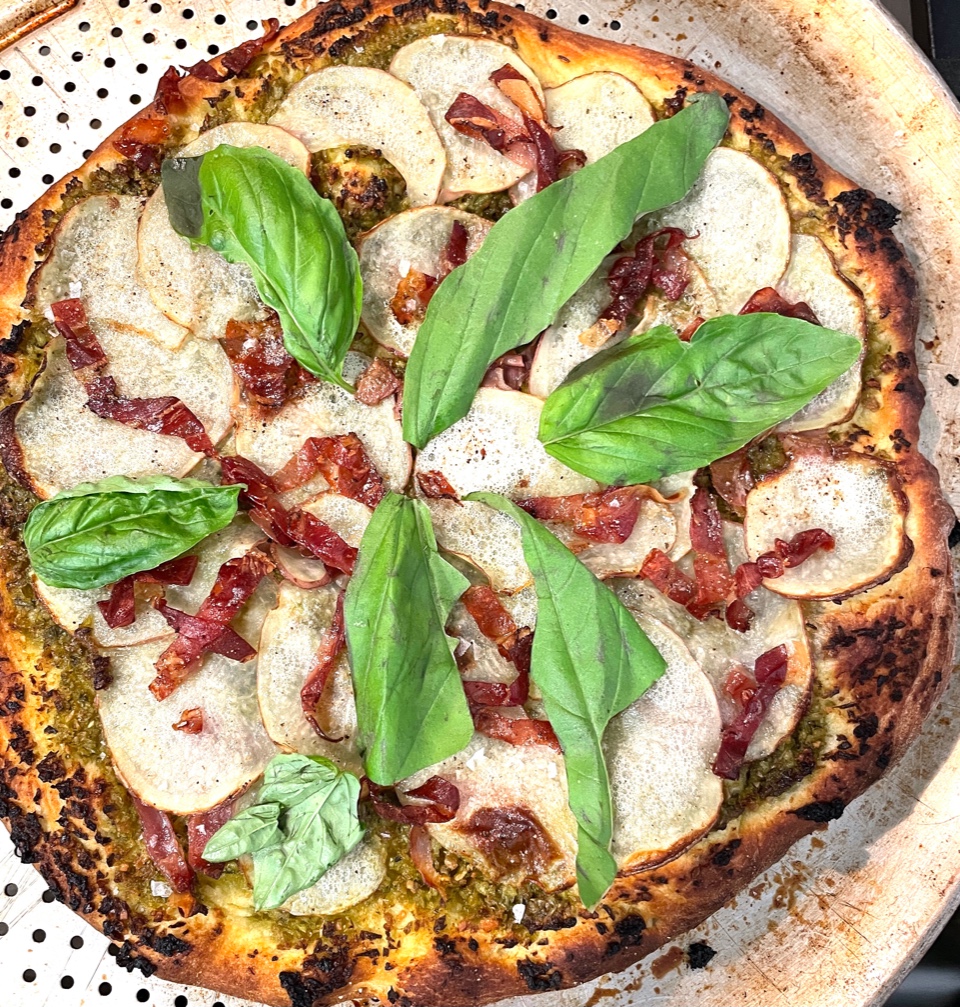
sour cherry tartines
Posted in Uncategorized on July 5, 2021| Leave a Comment »
These tartines are made with my home grown sour cherries, sugar, cornstarch and storebought puff pastry dough!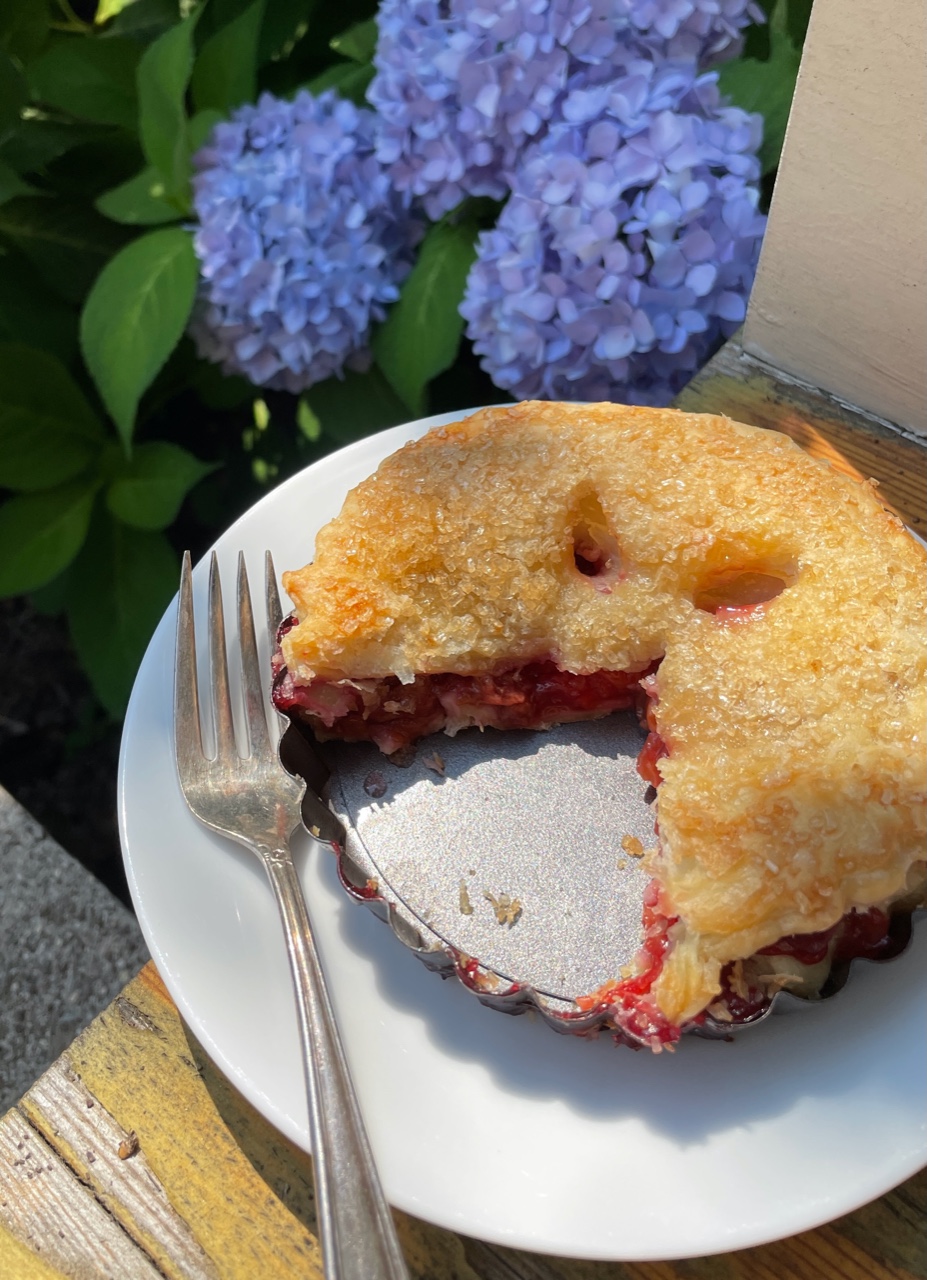
Life is just a bowl of sour cherries!
Posted in Uncategorized on July 3, 2021| Leave a Comment »

A bountiful year for Hydrangeas!
Posted in Uncategorized on June 25, 2021| 1 Comment »
Spectactular showing this year! Not sure why, last year it had one or two blooms, bumper crops this year!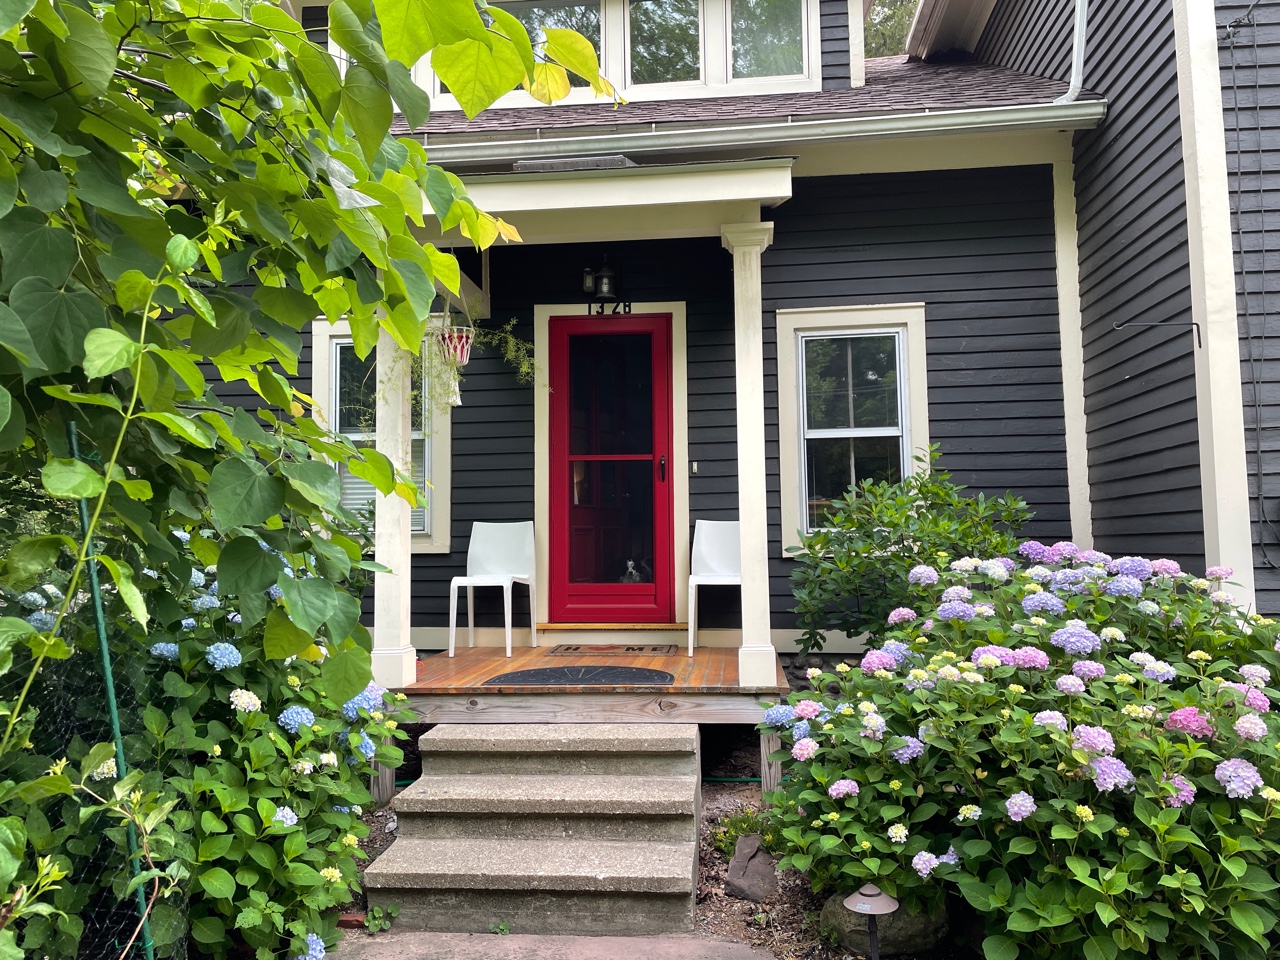
home made spinach croissants
Posted in Uncategorized on March 31, 2021| 1 Comment »
I tried these for the first time this morning, used pastry dough and a mix of spinach ricotta and bechamel for the filling!Not as good as a french patisserie but will do for breakfast!
apple gallette
Posted in Uncategorized on November 1, 2020| 1 Comment »
When winter sets in, make this smallish apple gallette!!!!!! One large apple is all you need, apple juice reduced, homemade pie dough apricot jam glaze!
Quiche Lorraine
Posted in Uncategorized on June 11, 2020| Leave a Comment »

I made this yesterday and it was amazing,Here is the recipe:
‘adapted from (Simply Recipes)’
Use about 1/2 cup leeks, finely chopped, and sautéed in butter first, before spreading over the bottom of the quiche crust with the cubed ham.
INGREDIENTS
- 1 recipe pie dough or a prepared frozen pie crust
- 1/2 pound (225 g) of cubed (1/2”) ham, fried up (you can use more or less to your taste)
- 1/2 cup (235 ml) milk
- 1/2 cup (118 ml) heavy cream
- 3 eggs
- 1/2 teaspoon salt
- Black pepper to taste (we used about 1/2 teaspoon)
- 1/8 teaspoon ground nutmeg
- 1 cup (4 ounces, 113 g) grated gruyere or other cheese (cheddar works too)
- 1 heaping tablespoon chopped chives or fresh chopped marjoram
1 Rollout the dough, form into a tart pan, then freeze: If you are making your own pie crust, roll out the pie dough into a 12-inch round. Place it in a 10-inch wide, 1 1/2-inch high tart pan, pressing the dough into the corners.
Use a rolling pin to roll over the surface of the tart pan to cleanly cut off the excess dough from the edges.
Freeze for at least half an hour before blind-baking.
2 Pre-bake the frozen crust: (also called “blind” baking) If you are using a store-bought frozen crust, follow the directions on the package for pre-baking.
If you are pre-baking a homemade crust, preheat oven to 350°F. Line the frozen crust with heavy duty aluminum foil. Allow for a couple inches to extend beyond the sides of the tart or pie pan.
Fill tart pan with dry beans, sugar, or rice, or the bottom of a smaller baking pan
If you are using a pan with a removable bottom, place the pan on a rimmed baking sheet in the oven to catch any spillage.
Bake for 15 minutes. Then remove from oven, remove the pie weights (the easiest way to do this is to lift up the foil by the edges) and the foil, and set aside.
3 Cook the ham: Heat a large frying pan on medium heat. Arrange ham cubes in a single layer on the bottom of the pan (you may need to work in batches or do two pans at once).
Slowly cook the ham until nicely browned and much of the fat has rendered out.
4 Preheat oven to 350°F.
5 Whisk eggs, add nutmeg, salt, pepper, cream, milk: Whisk the eggs in a large bowl. Add the nutmeg, salt, black pepper and chives and whisk a little more. Add the milk and cream and whisk vigorously to incorporate and introduce a little air into the mix – this keeps the texture of the quiche light and fluffy.
6 Put filling in pre-baked crust: Arrange the ham and cheese in the bottom of the pie crust.
Whisk the egg-milk mixture hard again for a few seconds, then pour it gently into the pie crust.
7 Bake: Put the quiche into the preheated oven and bake for 45 minutes.
Check for doneness after 30 minutes by gently jiggling the quiche. It should still have just a little wiggle. (It will finish setting while it cools.) Cool on a wire rack.
Eat at room temperature, cold (a quiche will keep for several days in the fridge), or reheated gently in a 200-degree oven.
Pie (Quiche)dough recipe:
This recipe makes 1 pâte brisée crust, enough for one tart or one bottom crust. If you are making a pie with a bottom and top crust, double this recipe and form two discs of dough instead of one.
I go back and forth on whether to use 8 Tbsp or 10 Tbsp of butter. If you are blind baking the crust (for example for a quiche), I recommend using 8 Tbsp of butter. The higher flour to fat ratio will help the crust keep its form when you pre-bake it.
If you are not pre-baking the crust I recommend using 10 Tbsp of butter, the higher fat to flour ratio will give you a flakier crust, and it will be easier to roll out.
INGREDIENTS
- 1 1/4 cups (160 g) all-purpose flour, plus extra for rolling
- 1/2 teaspoon salt
- 1/2 teaspoon sugar
- 8 Tbsp (1 stick, 112 g) chilled unsalted butter, cut into 1/2 inch cubes
- 3 to 4 Tbsp ice water, very cold
-
Join 81 other subscribers
-
Recent Posts
Top Posts & Pages
- antique art attic basil bedroom beef beer breakfast buckwheat butter cheese cherries cherry cooking croatia cups dogs east eggs farmer fennel fish flowers food france garden garlic ham hawaii hawthorne house italy kitchen lamb market maui metal miami mint nicoise oregon paint painting paris peaches pearl pinnacle pizza portland potatoes puff pastry rain red renovation ribs roses salad salmon siding silba soup spain spring summer sunnyside tart tomato tomatoes travel tree trim victorian water wood zagreb
Categories
- about life and art
- arriving in portland
- attic renovation
- back garden
- back yard
- back yard deck and stairs
- basement
- bathroom
- bedroom renovation
- beer makers
- beermakers
- Blues Festival
- books
- dining room art and design studio
- Dog food recipes
- europe
- Farmers Market
- fashion
- fashion design
- favorite stores
- Flowers
- food
- food show
- furniture
- garden show
- Hawthorne neighborhood
- house renovation exterior
- houses
- interior design
- interior renovation
- kitchen
- living in portland
- living in the Pearl
- looking for a house
- new york city
- original victorians
- our excursions
- painting
- parties
- patio
- photography
- Recipes
- renovation, house, victorian
- restaurants
- salads
- the truth of renovation
- things to do in oregon
- things we found
- truffles in oregon
- Uncategorized
- vacations
- vegetables
- water damage
- weather
- windows
October 2026 M T W T F S S 1 2 3 4 5 6 7 8 9 10 11 12 13 14 15 16 17 18 19 20 21 22 23 24 25 26 27 28 29 30 31 Recent Comments
Kat on new kitchen!!! Nicolas on Chanterelles in tillamook Rosemary on living in Portland kat on Tomato and onion tart kat on Basque piperade in a Le Creuse… Meta
-
recent posts


